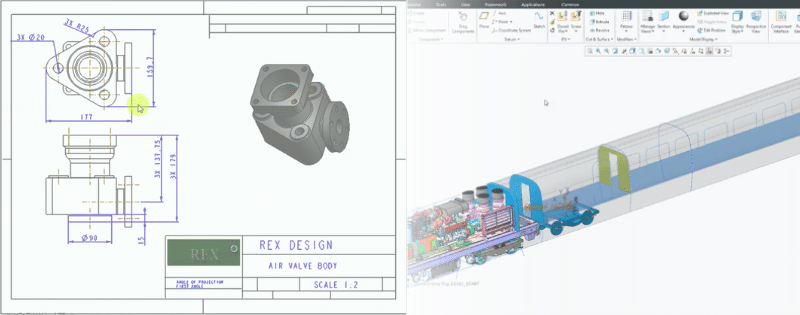
PTC Creo is the leading CAD software across the globe. Even as Creo 6.0 and the latest release of Creo 7.0 continue to propel design forward with augmented reality (AR) design capabilities, topology optimization, and more, one thing has remained the same: PTC Creo is only available for Windows.
If you have been using Creo for years, this probably isn’t a huge issue for you. You have likely always used a PC for Creo designs and have evolved your skills as the Creo UI and UX evolved too. However, many designers and creatives prefer to use Macs. If this is the case for you, you may feel like you need to use a different CAD solution or even invest in a Windows machine, but that is not necessary. Here is how you can get PTC Creo for Mac.
Let’s Rephrase: It’s More PTC Creo on Mac Rather Than PTC Creo for Mac
The truth is, there is no PTC Creo specifically designed for Mac. It simply doesn’t exist. However, it is still possible to run Creo on a Mac computer by:
- Using Boot Camp to run Windows OS
- Using Parallels or VMware Fusion to run a local Windows/Creo virtual machine
- Using XenDesktop to run a remote Windows/Creo virtual machine
There is no native PTC Creo for Mac application, but there are multiple ways that you can run Creo on a Mac computer.

Run Windows on Mac Using Boot Camp
Boot Camp is a native Mac program that allow you to install Windows in a dual-boot configuration. This doesn’t eliminate MacOS from your device; instead, you can choose to run either operating system when you boot your computer. You can’t switch between operating systems as you work, but this gives you full computing power to run Creo.
Using Boot Camp is the best option for Creo users looking to run Creo on a Mac. It allows you to use your full computer power by running Windows OS using the Mac hardware.
If you are working with Creo often, Boot Camp is going to be your best option. Since it simply uses Mac hardware to run Windows OS, you get the highest performance option without having to purchase another device or use performance-limiting virtualization software.
How to Install Boot Camp:
- Back up your computer: As always before any major software installation or update.
- Open Boot Camp Assistant: Press Command + Space, type “Boot Camp,” and press Enter.
- Boot Camp Assistant walks you through the installation process: This includes downloading drivers, partitioning, and the final installation. Partitioning allows you to predetermine how much space you want to allocate to each operating system, so take some time to think about which you may use more, the applications used on each, and file size when making these decisions.
- The computer automatically reboots: This is followed by the standard Windows OS installation process.
- Complete Creo installation: Once Windows is installed, you will be taken to the Windows desktop. From here, you can install all your required drivers and Creo as normal.
How to Run Windows OS:
The default Mac setting is to start up using OSX. If you want to boot Windows, press the Option/Alt key as your computer is turning on. By pressing this key, you will be given the option to boot OSX or Windows.
Virtualize Windows Locally Using Parallels for VMware
 A second option is to run Windows as a program within OSX and then run Creo through that software. You can do this by using software like VMware or Parallels. This is an ideal option for individuals who use Mac-exclusive programs often and don’t want to be forced to reboot multiple times throughout the day. However, using this option will significantly decrease the performance of Creo unless you have an upgraded and powerful machine.
Best for Small Tweaks and Adjustments
Since using virtualized software does cut down your computer’s performance ability, we recommend using this method if you are only working on small tweaks. Working with large Creo assemblies simply requires more computer power for longer workloads. In addition, standard Macs don’t have the graphics chips required for this type of work. So unless you are working on a very high-end and upgraded machine, you will likely be disappointed in its performance.
Pro Tip: If this sounds like the right option for you, there is a free trial version of Creo available. We recommend testing that out using VMware or Parallels before purchasing just to make sure that the level of performance will work for your needs.
Native Creo “Citrix Ready” Compatibility Using XenDesktop
Given the increased popularity of Macs over the last few years, PTC has developed an option for users that allows them to run certain PTC Creo programs on a Mac without installing additional software. These capabilities were first released with Creo 3.0 and have been maintained through the Creo 4.0, Creo 5.0 and Creo 6.0 releases. These “Citrix Ready” programs include:
As “Citrix Ready” programs, these specific applications can be used with virtualized desktops that are run on an IBM server using a Citrix and NVIDIA integration. When the programs are used this way, users are essentially running the software on a remote server and getting the functionality and images projected to their personal devices vis XenDesktop.
Added Benefits of Remote Virtualization
There are some additional benefits to utilizing remote virtualization for Creo. This option can be used for Mac users or Windows users.
- Increased performance: Using projected virtualized software using the “Citrix Ready” integration significantly boosts performance rather than inhibiting it as with standard virtualized desktops. This makes it much easier to work on larger assemblies without getting slowed down.
- Simplified IT: Instead of having to individually install software updates on every single device, IT can simply update the software on one server and the global team can access the latest software from there.
- Stronger IP protection: By maintaining data on servers instead of local machines, organizations have increased IP security and can better avoid potential cyber risks.
- Improved collaboration: Since all data is stored on a central server, multiple teams can access the data without being forced to load it across a network. This streamlined access can significantly improve collaboration between global teams.
Organizations can choose to use the “Citrix Ready” virtualization setup whether they want to run Creo on a Mac or they simply want to have high-performance Creo capabilities in a virtualized environment across their organizations.
Some Creo Programs Are Supported via iOS
While the separation between Macs and Windows is apparent, Apple has dominated much of the device industry with its iPhones and iPads. In order to better serve its customers, PTC has released some native iOS apps:

- Creo Sketch (for iPads running iOS 7 and above): This is a stand-alone application for engineers and designers to quickly sketch their ideas.
- Creo View Mobile (iPad, iPhone, iPod Touch running iOS 5 and above): View Creo 3D CAD files on the go using various mobile Apple devices. This application can also be used to view CAD design created using other platforms and then published using Creo View.
PTC Creo on Mac: Where to Begin?
There is a lot to consider when you choose to use PTC Creo for Mac. Besides just figuring out the right environment, you must also consider the Creo package that will best suit your needs or those of your organization. Plus, setting up a virtualized environment can be really complicated.
At 3HTi, we have lots of experience working with all PTC software. We can help you determine which package is right for you and even help you with setting up your working environment. If you are looking for some additional assistance on PTC Creo, just contact us.

