New Printer Options
We no longer sell the Markforged line of 3D printers, but we do offer the leading open source material printers from German RapRap, incredible printers from EnvisionTEC, and latest industrial printers from MakerBot. Check them out below.
As any machinist will tell you, it’s all in the fixturing! Who would have thought that a 3D printed part itself might require a fixture to be printed?
Once of the major considerations when 3D printing a part is how to orient the part, which plays a role both in the fiber placement throughout the part and the surface finish on the outside.
In the same way a slightly sloped line on a 2D raster screen will appear jagged — on a 3D printed model, slightly sloped areas will display what I think of as the topological map effect where topological lines of slightly horizontal surfaces are further apart than lines on nearly vertical surfaces. Obviously, steeply sloped surfaces will have a finer surface finish than more horizontal surfaces. In addition, the use of supports can degrade the surface finish of the part surfaces they are supporting. Consider the part shown in Figure 1.
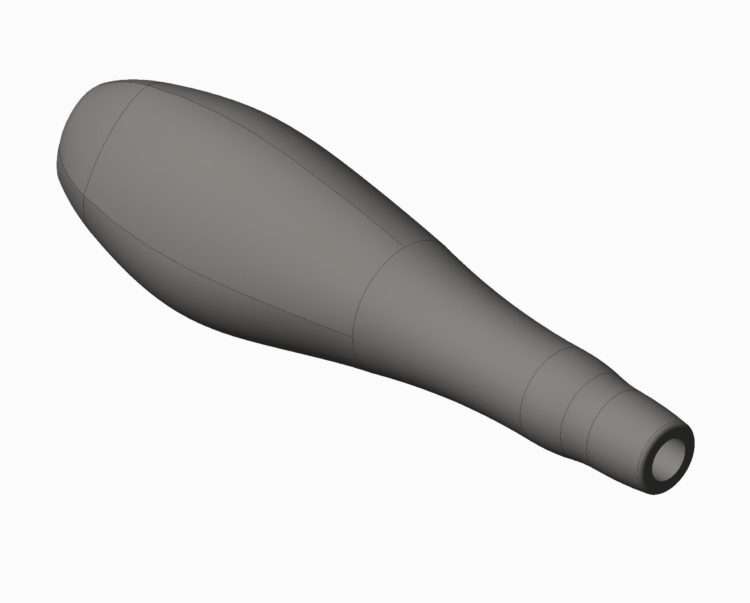
Figure 1.
To achieve the best surface finish with the least amount of surface area showing the topological line effect and to minimize support material, the part should be oriented as shown in Figure 2.
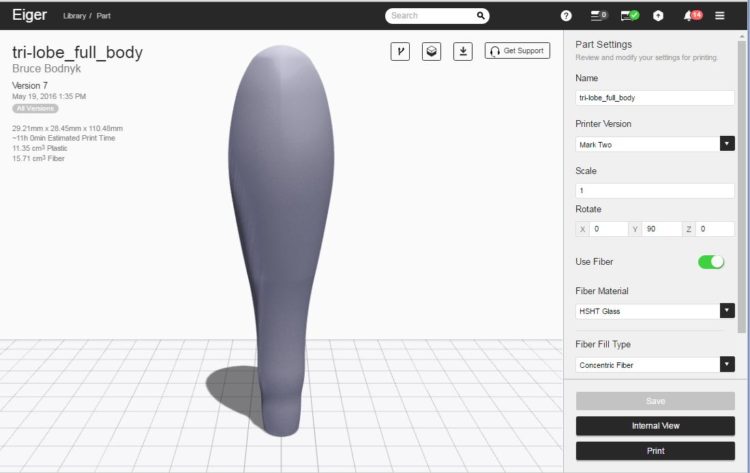
Figure 2.
Because of the nearly vertical walls of the part, oriented in this way, the part does not require supports and the slightly sloped surfaces are concentrated at the top of the part, minimizing their size.
Unfortunately, a part such as this can’t be successfully printed in this orientation. The surface area of the part touching the build plate is very minimal. The printer would print possibly 1/3 of the layers at most at which point the part would detach from the build plate and the print would fail.
As the print head moves across the part, either because of the viscosity of the nylon or the resistance of the fiber, the print head is pulling sideways on the part. This sideways force generally is minimal, however, the taller the part the greater the force is magnified. At some point on this part, it is great enough to pull the part off the build plate, because of the small surface area of the part touching the build plate.
Rotating the part 180 degrees might allow the part to be printed — however, it would then require support material on the bottom which would mar the surface finish on the end of the part.
The solution is to allow the part to print partially and then add external supports to keep the lower portion of the part secure, as shown in Figure 3. This is easily accomplished on the Mark Two printer, as it allows a print to be paused.
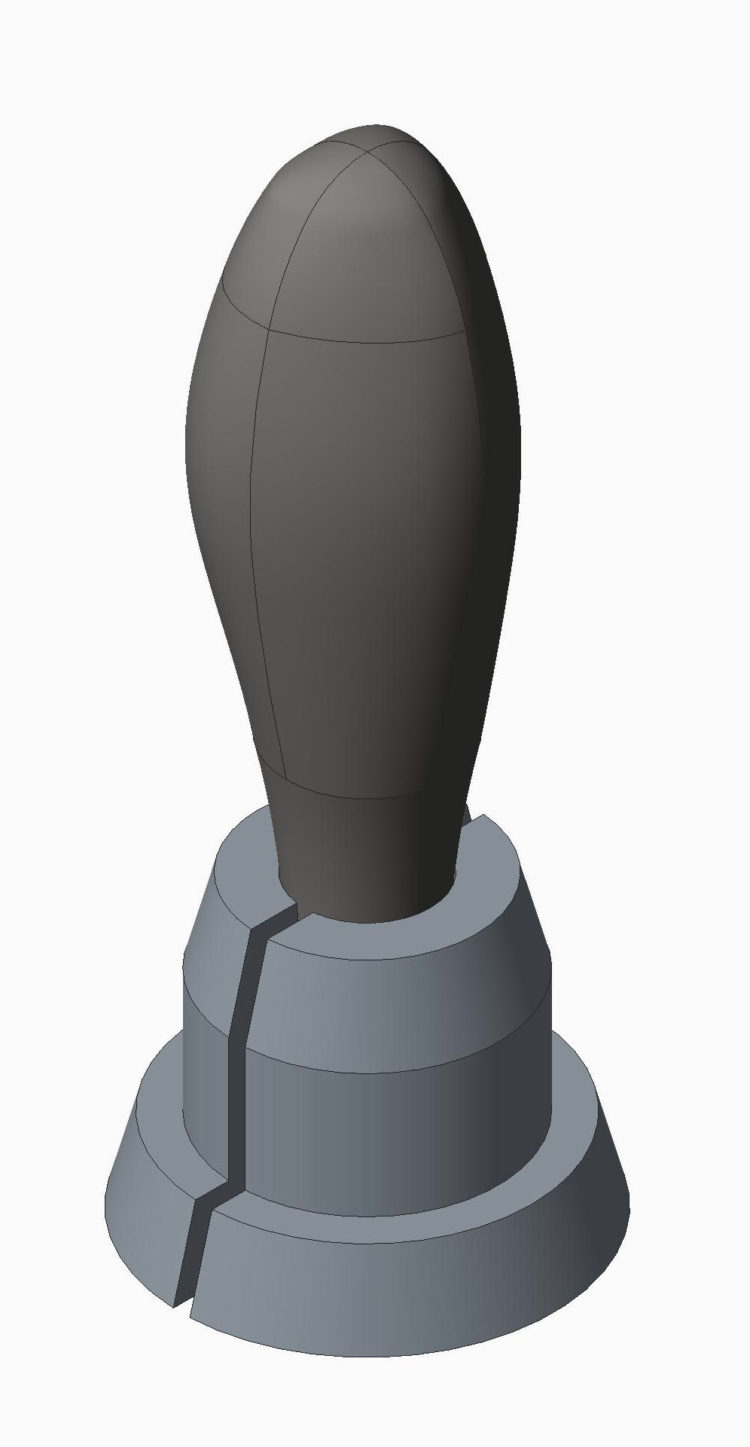
Figure 3.
When the printer reaches a layer slightly higher than the support height, the printer would pause, allowing the previously printed support pieces to be glued to the build plate. In this case, the flat vertical surface would allow a zip tie to be used if needed to hold them in position. The printing would then be resumed and the upper portion of the part could be successfully printed.
Figure 4 shows the supports after being printed. They will be taken off the build plate, but they will not be washed to remove the glue as they will eventually be glued back on.
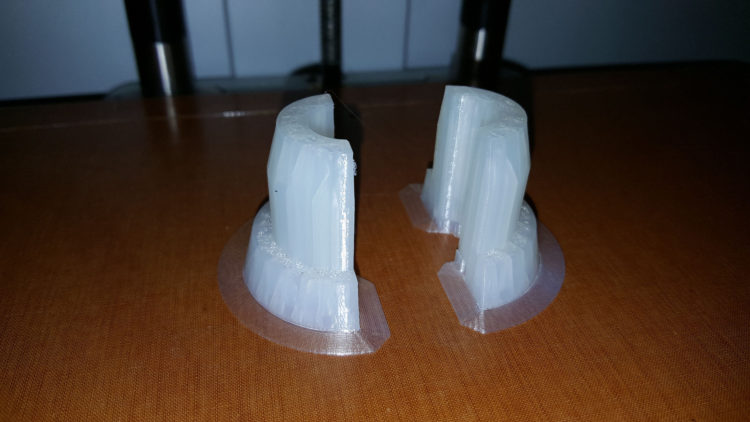
Figure 4.
Figure 5 shows the intended part in the process of being printed with the supports added. The build was paused when the part height was about 1mm above the height of the supports. The printed supports were then glued into position and the printing was resumed. In this case, the glue seemed sufficient to hold the supports, so no zip tie was needed.
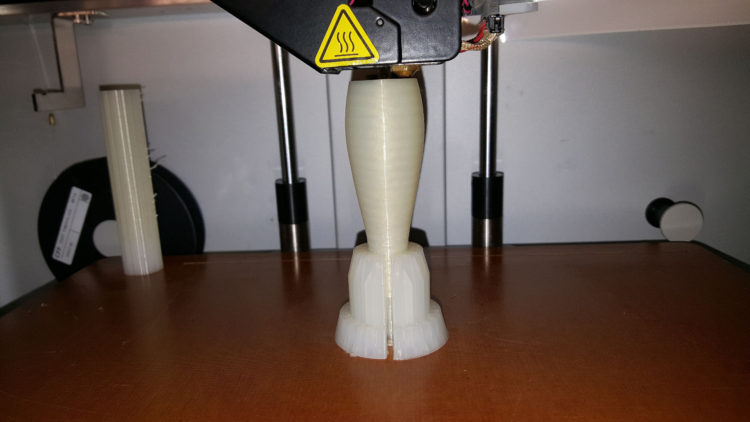
Figure 5.
As any machinist will tell you, it’s all in the fixturing! Who would have thought that a 3D printed part itself might require a fixture to be printed? The finished part shown in Figure 6 has an extremely smooth surface finish along most of its length. Without the use of external supports, it would be impossible to print the part and achieve the same surface finish.
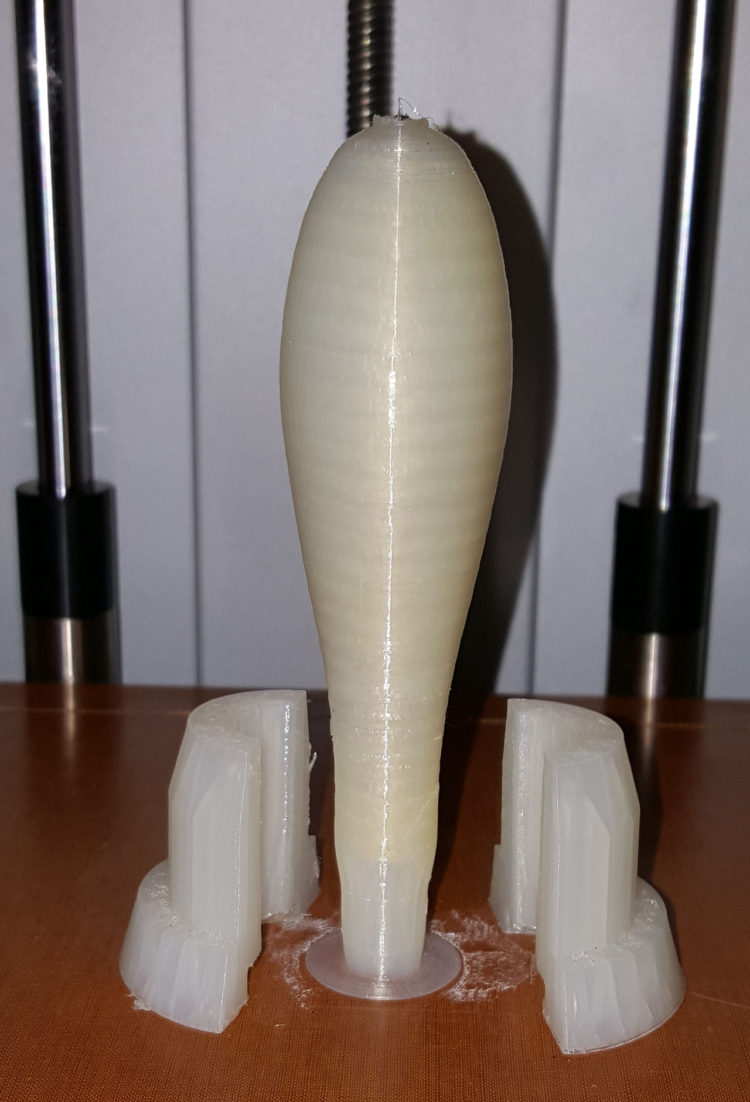
Figure 6.
After completing the part, it occurred to me that the part with its supports could have been printed all at one time. I tried it on a similar part and it worked perfectly. Additional pieces could then be printed using the supports from the first piece gluing them into position as described above.
Interested in the Mark Two?
Learn more about the Mark Two pricing options, or contact us today.